## Table of Contents
- [Why simple-ffmpeg?](#why-simple-ffmpeg)
- [Features](#features)
- [Installation](#installation)
- [Quick Start](#quick-start)
- [Pre-Validation](#pre-validation)
- [Schema Export](#schema-export)
- [API Reference](#api-reference)
- [Constructor](#constructor)
- [Methods](#methods)
- [Auto-Sequencing & Duration Shorthand](#auto-sequencing--duration-shorthand)
- [Clip Types](#clip-types) — Video, Image, Color, Effect, Text, Subtitle, Audio, Background Music
- [Platform Presets](#platform-presets)
- [Watermarks](#watermarks)
- [Progress Information](#progress-information)
- [Logging](#logging)
- [Error Handling](#error-handling)
- [Cancellation](#cancellation)
- [Examples](#examples)
- [Clips & Transitions](#clips--transitions)
- [Text & Animations](#text--animations)
- [Karaoke](#karaoke)
- [Subtitles](#subtitles)
- [Export Settings](#export-settings)
- [Real-World Usage Patterns](#real-world-usage-patterns)
- [Data Pipeline](#data-pipeline-example)
- [AI Video Pipeline](#ai-video-generation-pipeline-example)
- [Advanced](#advanced)
- [Timeline Behavior](#timeline-behavior)
- [Auto-Batching](#auto-batching)
- [Testing](#testing)
- [Contributing](#contributing)
- [License](#license)
## Why simple-ffmpeg?
FFmpeg is incredibly powerful, but its command-line interface is notoriously difficult to work with programmatically. Composing even a simple two-clip video with a crossfade requires navigating complex filter graphs, input mapping, and stream labeling. simple-ffmpeg abstracts all of that behind a declarative, config-driven API. You describe _what_ your video should look like, and the library figures out _how_ to build the FFmpeg command.
The entire timeline is expressed as a plain array of clip objects, making it straightforward to generate configurations from any data source: databases, APIs, templates, or AI models. Structured validation with machine-readable error codes means you can catch problems early and handle them programmatically, whether that's logging a warning, retrying with corrected input, or surfacing feedback to an end user.
## Example Output
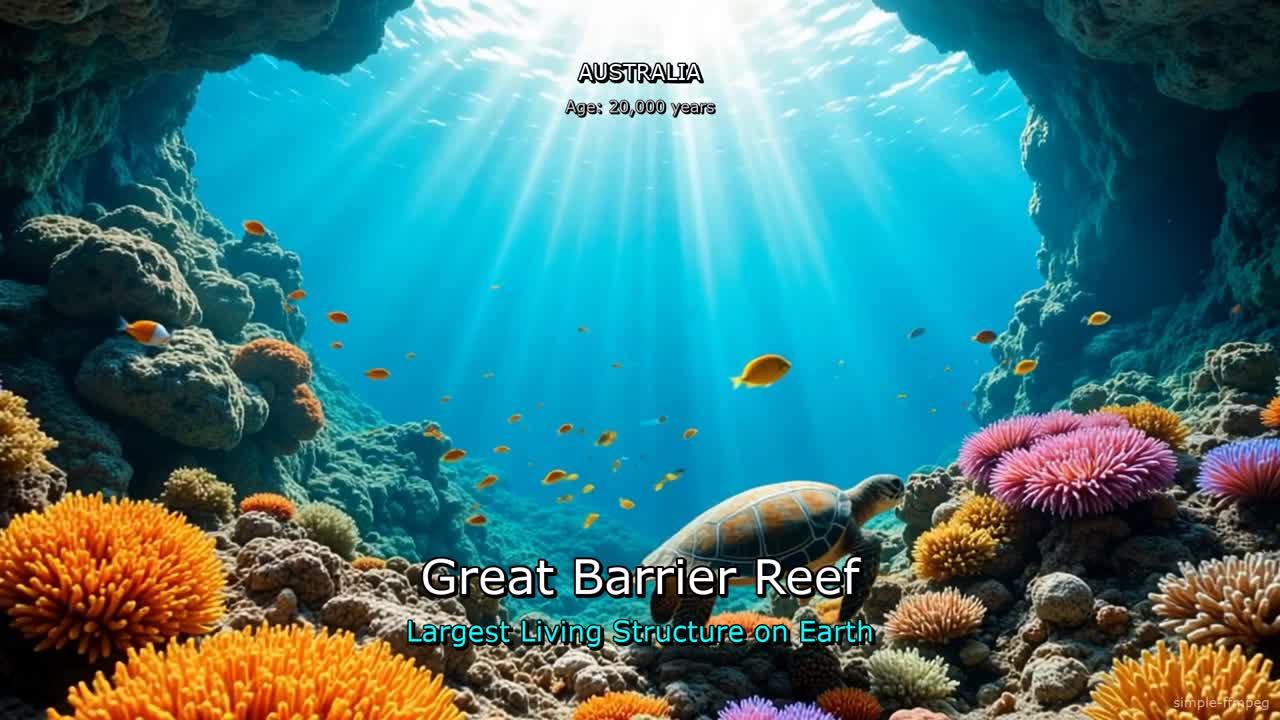
_Click to watch a "Wonders of the World" video created with simple-ffmpeg — combining multiple video clips with crossfade transitions, animated text overlays, and background music._
## Features
**Video & Images**
- **Video Concatenation** — Join multiple clips with optional xfade transitions
- **Image Support** — Ken Burns effects (zoom, pan) for static images with intelligent aspect ratio handling
- **Image Fitting** — Automatic blur-fill, cover, or contain modes when image aspect ratio differs from output
- **Color Clips** — Flat colors and gradients (linear, radial) as first-class timeline clips with full transition support
**Audio**
- **Audio Mixing** — Layer audio tracks, voiceovers, and background music
**Overlays & Effects**
- **Text Overlays** — Static, word-by-word, and cumulative text with animations
- **Emoji Support** — Opt-in emoji rendering via custom font + libass; stripped by default for clean output
- **Text Animations** — Typewriter, scale-in, pulse, fade effects
- **Karaoke Mode** — Word-by-word highlighting with customizable colors
- **Subtitle Import** — Load SRT, VTT, ASS/SSA subtitle files
- **Watermarks** — Text or image overlays with positioning and timing control
- **Effect Clips** — Timed overlay effects (vignette, film grain, blur, color adjust, sepia, black & white, sharpen, chromatic aberration, letterbox) with fade-in/out envelopes
**Analysis & Extraction**
- **Keyframe Extraction** — Scene-change detection or fixed-interval frame sampling, returning in-memory buffers or files on disk
**Developer Experience**
- **Platform Presets** — Quick configuration for TikTok, YouTube, Instagram, etc.
- **Progress Tracking** — Real-time export progress callbacks
- **Cancellation** — AbortController support for stopping exports
- **Auto-Batching** — Automatically splits complex filter graphs to avoid OS command limits
- **Schema Export** — Generate a structured description of the clip format for documentation, code generation, or AI context
- **Pre-Validation** — Validate clip configurations before processing with structured, machine-readable error codes
- **TypeScript Ready** — Full type definitions included
- **Zero Dependencies** — Only requires FFmpeg on your system
## Installation
```bash
npm install simple-ffmpegjs
```
### Prerequisites
FFmpeg must be installed and available in your PATH:
```bash
# macOS
brew install ffmpeg
# Ubuntu/Debian
apt-get install ffmpeg
# Windows
# Download from https://ffmpeg.org/download.html
```
For text overlays, ensure your FFmpeg build includes `libfreetype` and `fontconfig`. On minimal systems (Docker, Alpine), install a font package:
```bash
# Alpine
apk add --no-cache ffmpeg fontconfig ttf-dejavu
# Debian/Ubuntu
apt-get install -y ffmpeg fontconfig fonts-dejavu-core
```
**Emoji in text overlays** are handled gracefully: by default, emoji characters are automatically detected and silently stripped from text to prevent blank boxes (tofu). To render emoji, pass an `emojiFont` path in the constructor:
```javascript
const project = new SIMPLEFFMPEG({
width: 1920,
height: 1080,
emojiFont: '/path/to/NotoEmoji-Regular.ttf'
});
```
Recommended font: [Noto Emoji](https://fonts.google.com/noto/specimen/Noto+Emoji) (B&W outline, ~2 MB, SIL OFL). Download from [Google Fonts](https://fonts.google.com/noto/specimen/Noto+Emoji) or [GitHub](https://github.com/google/fonts/raw/main/ofl/notoemoji/NotoEmoji%5Bwght%5D.ttf). When an emoji font is configured, emoji text is routed through libass (ASS subtitle path) with inline `\fn` font switching for per-glyph rendering.
> **Note:** Emoji render as monochrome outlines because libass does not yet support color emoji font formats. The shapes are recognizable and correctly spaced, just not multi-colored. Without `emojiFont`, emoji are stripped and a one-time console warning is logged.
## Quick Start
```js
import SIMPLEFFMPEG from "simple-ffmpegjs";
// Use a platform preset — or set width/height/fps manually
const project = new SIMPLEFFMPEG({ preset: "youtube" });
await project.load([
// Two video clips with a crossfade transition between them
{ type: "video", url: "./opening-shot.mp4", position: 0, end: 6 },
{
type: "video",
url: "./highlights.mp4",
position: 5.5,
end: 18,
cutFrom: 3, // start 3s into the source file
transition: { type: "fade", duration: 0.5 },
},
// Title card with a pop animation
{
type: "text",
text: "Summer Highlights 2025",
position: 0.5,
end: 4,
fontFile: "./fonts/Montserrat-Bold.ttf",
fontSize: 72,
fontColor: "#FFFFFF",
borderColor: "#000000",
borderWidth: 2,
xPercent: 0.5,
yPercent: 0.4,
animation: { type: "pop", in: 0.3 },
},
// Background music — loops to fill the whole video
{ type: "music", url: "./chill-beat.mp3", volume: 0.2, loop: true },
]);
await project.export({
outputPath: "./summer-highlights.mp4",
onProgress: ({ percent }) => console.log(`${percent}% complete`),
});
```
## Pre-Validation
Validate clip configurations before creating a project. Useful for catching errors early in data pipelines, form-based editors, or any workflow where configurations are generated dynamically:
```js
import SIMPLEFFMPEG from "simple-ffmpegjs";
const clips = [
{ type: "video", url: "./intro.mp4", position: 0, end: 5 },
{ type: "text", text: "Hello", position: 1, end: 4 },
];
// Validate without creating a project
const result = SIMPLEFFMPEG.validate(clips, {
skipFileChecks: true, // Skip file existence checks (useful when files aren't on disk yet)
width: 1920, // Project dimensions (for Ken Burns size validation)
height: 1080,
strictKenBurns: false, // If true, undersized Ken Burns images error instead of warn (default: false)
});
if (!result.valid) {
// Structured errors for programmatic handling
result.errors.forEach((err) => {
console.log(`[${err.code}] ${err.path}: ${err.message}`);
// e.g. [MISSING_REQUIRED] clips[0].url: URL is required for media clips
});
}
// Or get human-readable output
console.log(SIMPLEFFMPEG.formatValidationResult(result));
```
### Validation Codes
Access error codes programmatically for custom handling:
```js
const { ValidationCodes } = SIMPLEFFMPEG;
// Available codes:
// INVALID_TYPE, MISSING_REQUIRED, INVALID_VALUE, INVALID_RANGE,
// INVALID_TIMELINE, TIMELINE_GAP, FILE_NOT_FOUND, INVALID_FORMAT,
// INVALID_WORD_TIMING, OUTSIDE_BOUNDS
if (result.errors.some((e) => e.code === ValidationCodes.TIMELINE_GAP)) {
// Handle gap-specific logic
}
```
## Schema Export
Export a structured, human-readable description of all clip types accepted by `load()`. The output is designed to serve as context for LLMs, documentation generators, code generation tools, or anything that needs to understand the library's clip format.
### Basic Usage
```js
// Get the full schema (all clip types)
const schema = SIMPLEFFMPEG.getSchema();
console.log(schema);
```
The output is a formatted text document with type definitions, allowed values, usage notes, and examples for each clip type.
### Filtering Modules
The schema is broken into modules — one per clip type. You can include or exclude modules to control exactly what appears in the output:
```js
// Only include video and image clip types
const schema = SIMPLEFFMPEG.getSchema({ include: ["video", "image"] });
// Include everything except text and subtitle
const schema = SIMPLEFFMPEG.getSchema({ exclude: ["text", "subtitle"] });
// See all available module IDs
SIMPLEFFMPEG.getSchemaModules();
// ['video', 'audio', 'image', 'color', 'effect', 'text', 'subtitle', 'music']
```
Available modules:
| Module | Covers |
| ---------- | ----------------------------------------------------------- |
| `video` | Video clips, transitions, volume, trimming |
| `audio` | Standalone audio clips |
| `image` | Image clips, Ken Burns effects, image fitting modes |
| `color` | Color clips — flat colors, linear/radial gradients |
| `effect` | Overlay adjustment effects — vignette, grain, blur, color adjust, sepia, B&W, sharpen, chromatic aberration, letterbox |
| `text` | Text overlays — all modes, animations, positioning, styling |
| `subtitle` | Subtitle file import (SRT, VTT, ASS, SSA) |
| `music` | Background music / background audio, looping |
### Custom Instructions
Embed your own instructions directly into the schema output. Top-level instructions appear at the beginning, and per-module instructions are placed inside the relevant section — formatted identically to the built-in notes:
```js
const schema = SIMPLEFFMPEG.getSchema({
include: ["video", "image", "music"],
instructions: [
"You are creating short cooking tutorials for TikTok.",
"Keep all videos under 30 seconds.",
],
moduleInstructions: {
video: [
"Always use fade transitions at 0.5s.",
"Limit to 5 clips maximum.",
],
music: "Always include background music at volume 0.15.",
},
});
```
Both `instructions` and `moduleInstructions` values accept a `string` or `string[]`. Per-module instructions for excluded modules are silently ignored.
## API Reference
### Constructor
```ts
new SIMPLEFFMPEG(options?: {
width?: number; // Output width (default: 1920)
height?: number; // Output height (default: 1080)
fps?: number; // Frame rate (default: 30)
validationMode?: 'warn' | 'strict'; // Validation behavior (default: 'warn')
preset?: string; // Platform preset (e.g., 'tiktok', 'youtube', 'instagram-post')
fontFile?: string; // Default font file for all text clips (individual clips can override)
emojiFont?: string; // Path to emoji font .ttf for opt-in emoji rendering (stripped by default)
tempDir?: string; // Custom temp directory for intermediate files (default: OS temp)
})
```
**Custom Temp Directory:**
Set `tempDir` to route all temporary files (gradient images, unrotated videos, text/subtitle temp files, batch intermediate renders) to a custom location. Useful for fast SSDs, ramdisks, Docker containers with limited `/tmp`, or any environment where temp storage performance matters:
```ts
const project = new SIMPLEFFMPEG({
preset: "youtube",
tempDir: "/mnt/fast-nvme/tmp",
});
```
When not set, temp files go to the OS default (`os.tmpdir()`) or next to the output file, depending on the operation. Cross-filesystem moves are handled automatically.
When `fontFile` is set at the project level, every text clip (including karaoke) inherits it automatically. You can still override it on any individual clip:
```js
const project = new SIMPLEFFMPEG({
preset: "tiktok",
fontFile: "./fonts/Montserrat-Bold.ttf", // applies to all text clips
});
await project.load([
{ type: "video", url: "intro.mp4", position: 0, end: 10 },
// Uses the global font
{ type: "text", text: "Hello!", position: 1, end: 4, fontSize: 72 },
// Overrides with a different font
{ type: "text", text: "Special", position: 5, end: 8, fontFile: "./fonts/Italic.otf" },
]);
```
### Methods
#### `project.load(clips)`
Load clip descriptors into the project. Validates the timeline and reads media metadata.
```ts
await project.load(clips: Clip[]): Promise
```
#### `SIMPLEFFMPEG.getDuration(clips)`
Calculate the total visual timeline duration from a clips array. Handles `duration` and auto-sequencing shorthand, and subtracts transition overlaps. Pure function — no file I/O.
```ts
const clips = [
{ type: "video", url: "./a.mp4", duration: 5 },
{
type: "video",
url: "./b.mp4",
duration: 10,
transition: { type: "fade", duration: 0.5 },
},
];
SIMPLEFFMPEG.getDuration(clips); // 14.5
```
Useful for computing text overlay timings or background music end times before calling `load()`.
#### `SIMPLEFFMPEG.probe(filePath)`
Probe a media file and return comprehensive metadata using ffprobe. Works with video, audio, and image files.
```ts
const info = await SIMPLEFFMPEG.probe("./video.mp4");
// {
// duration: 30.5, // seconds
// width: 1920, // pixels
// height: 1080, // pixels
// hasVideo: true,
// hasAudio: true,
// rotation: 0, // iPhone/mobile rotation
// videoCodec: "h264",
// audioCodec: "aac",
// format: "mov,mp4,m4a,3gp,3g2,mj2",
// fps: 30,
// size: 15728640, // bytes
// bitrate: 4125000, // bits/sec
// sampleRate: 48000, // Hz
// channels: 2 // stereo
// }
```
Fields that don't apply to the file type are `null` (e.g. `width`/`height`/`videoCodec`/`fps` for audio-only files, `audioCodec`/`sampleRate`/`channels` for video-only files).
Throws `MediaNotFoundError` if the file cannot be found or probed.
```ts
// Audio file
const audio = await SIMPLEFFMPEG.probe("./music.wav");
console.log(audio.hasVideo); // false
console.log(audio.duration); // 180.5
console.log(audio.sampleRate); // 44100
```
#### `SIMPLEFFMPEG.snapshot(filePath, options)`
Capture a single frame from a video file and save it as an image. This is a static method — no project instance needed.
The output format is determined by the `outputPath` file extension. FFmpeg handles format detection internally, so `.jpg` produces JPEG, `.png` produces PNG, `.webp` produces WebP, etc.
```ts
await SIMPLEFFMPEG.snapshot("./video.mp4", {
outputPath: "./frame.png",
time: 5,
});
```
**Snapshot Options:**
| Option | Type | Default | Description |
| ------------ | -------- | ------- | -------------------------------------------------------------------------- |
| `outputPath` | `string` | - | **Required.** Output image path (extension determines format) |
| `time` | `number` | `0` | Time in seconds to capture the frame at |
| `width` | `number` | - | Output width in pixels (maintains aspect ratio if height omitted) |
| `height` | `number` | - | Output height in pixels (maintains aspect ratio if width omitted) |
| `quality` | `number` | `2` | JPEG quality 1-31, lower is better (only applies to `.jpg`/`.jpeg` output) |
**Supported formats:** `.jpg` / `.jpeg`, `.png`, `.webp`, `.bmp`, `.tiff`
```ts
// Save as JPEG with quality control and resize
await SIMPLEFFMPEG.snapshot("./video.mp4", {
outputPath: "./thumb.jpg",
time: 10,
width: 640,
quality: 4,
});
// Save as WebP
await SIMPLEFFMPEG.snapshot("./video.mp4", {
outputPath: "./preview.webp",
time: 0,
});
```
#### `SIMPLEFFMPEG.extractKeyframes(filePath, options)`
Extract keyframes from a video using scene-change detection or fixed time intervals. This is a static method — no project instance needed.
**Scene-change mode** (default) uses FFmpeg's `select=gt(scene,N)` filter to intelligently detect visual transitions and extract frames at cut points. **Interval mode** extracts frames at fixed time intervals.
When `outputDir` is provided, frames are written to disk and the method returns an array of file paths. Without `outputDir`, frames are returned as in-memory `Buffer` objects (no temp files left behind).
```ts
// Scene-change detection — returns Buffer[]
const frames = await SIMPLEFFMPEG.extractKeyframes("./video.mp4", {
mode: "scene-change",
sceneThreshold: 0.4,
maxFrames: 8,
format: "jpeg",
});
// Fixed interval — writes to disk, returns string[]
const paths = await SIMPLEFFMPEG.extractKeyframes("./video.mp4", {
mode: "interval",
intervalSeconds: 5,
outputDir: "./frames/",
format: "png",
});
```
**Keyframe Options:**
| Option | Type | Default | Description |
| ----------------- | -------- | ---------------- | ------------------------------------------------------------------------------- |
| `mode` | `string` | `'scene-change'` | `'scene-change'` for intelligent detection, `'interval'` for fixed time spacing |
| `sceneThreshold` | `number` | `0.3` | Scene detection sensitivity 0-1 (lower = more frames). Scene-change mode only. |
| `intervalSeconds` | `number` | `5` | Seconds between frames. Interval mode only. |
| `maxFrames` | `number` | - | Maximum number of frames to extract |
| `format` | `string` | `'jpeg'` | Output format: `'jpeg'` or `'png'` |
| `quality` | `number` | - | JPEG quality 1-31, lower is better (only applies to JPEG) |
| `width` | `number` | - | Output width in pixels (maintains aspect ratio if height omitted) |
| `height` | `number` | - | Output height in pixels (maintains aspect ratio if width omitted) |
| `outputDir` | `string` | - | Directory to write frames to. If omitted, returns `Buffer[]` instead. |
| `tempDir` | `string` | `os.tmpdir()` | Custom temp directory (only when `outputDir` is not set). Useful for fast SSDs or ramdisks. |
```ts
// Scene-change with resize and JPEG quality
const frames = await SIMPLEFFMPEG.extractKeyframes("./long-video.mp4", {
sceneThreshold: 0.25,
maxFrames: 12,
width: 640,
quality: 4,
});
// One frame every 10 seconds, saved as PNG
const paths = await SIMPLEFFMPEG.extractKeyframes("./presentation.mp4", {
mode: "interval",
intervalSeconds: 10,
outputDir: "./thumbnails/",
format: "png",
});
```
Throws `FFmpegError` if FFmpeg fails during extraction.
#### `project.export(options)`
Build and execute the FFmpeg command to render the final video.
```ts
await project.export(options?: ExportOptions): Promise
```
**Export Options:**
| Option | Type | Default | Description |
| ----------------------- | ------------- | ---------------- | -------------------------------------------------------------------------------- |
| `outputPath` | `string` | `'./output.mp4'` | Output file path |
| `videoCodec` | `string` | `'libx264'` | Video codec (`libx264`, `libx265`, `libvpx-vp9`, `prores_ks`, hardware encoders) |
| `crf` | `number` | `23` | Quality level (0-51, lower = better) |
| `preset` | `string` | `'medium'` | Encoding preset (`ultrafast` to `veryslow`) |
| `videoBitrate` | `string` | - | Target bitrate (e.g., `'5M'`). Overrides CRF. |
| `audioCodec` | `string` | `'aac'` | Audio codec (`aac`, `libmp3lame`, `libopus`, `flac`, `copy`) |
| `audioBitrate` | `string` | `'192k'` | Audio bitrate |
| `audioSampleRate` | `number` | `48000` | Audio sample rate in Hz |
| `hwaccel` | `string` | `'none'` | Hardware acceleration (`auto`, `videotoolbox`, `nvenc`, `vaapi`, `qsv`) |
| `outputWidth` | `number` | - | Scale output width |
| `outputHeight` | `number` | - | Scale output height |
| `outputResolution` | `string` | - | Resolution preset (`'720p'`, `'1080p'`, `'4k'`) |
| `audioOnly` | `boolean` | `false` | Export audio only (no video) |
| `twoPass` | `boolean` | `false` | Two-pass encoding for better quality |
| `metadata` | `object` | - | Embed metadata (title, artist, etc.) |
| `thumbnail` | `object` | - | Generate thumbnail image |
| `verbose` | `boolean` | `false` | Enable verbose logging |
| `saveCommand` | `string` | - | Save FFmpeg command to file |
| `onProgress` | `function` | - | Progress callback |
| `onLog` | `function` | - | FFmpeg log callback (see [Logging](#logging) section) |
| `signal` | `AbortSignal` | - | Cancellation signal |
| `watermark` | `object` | - | Add watermark overlay (see Watermarks section) |
| `compensateTransitions` | `boolean` | `true` | Auto-adjust text timings for transition overlap (see below) |
#### `project.preview(options)`
Get the FFmpeg command without executing it. Useful for debugging or dry runs.
```ts
await project.preview(options?: ExportOptions): Promise<{
command: string; // Full FFmpeg command
filterComplex: string; // Filter graph
totalDuration: number; // Expected output duration
}>
```
### Auto-Sequencing & Duration Shorthand
For video, image, and audio clips, you can use shorthand to avoid specifying explicit `position` and `end` values:
- **`duration`** — Use instead of `end`. The library computes `end = position + duration`. You cannot specify both `duration` and `end` on the same clip.
- **Omit `position`** — The clip is placed immediately after the previous clip on its track. Video and image clips share the visual track; audio clips have their own track. The first clip defaults to `position: 0`.
These can be combined:
```ts
// Before: manual position/end for every clip
await project.load([
{ type: "video", url: "./a.mp4", position: 0, end: 5 },
{ type: "video", url: "./b.mp4", position: 5, end: 10 },
{ type: "video", url: "./c.mp4", position: 10, end: 18, cutFrom: 3 },
]);
// After: auto-sequencing + duration
await project.load([
{ type: "video", url: "./a.mp4", duration: 5 },
{ type: "video", url: "./b.mp4", duration: 5 },
{ type: "video", url: "./c.mp4", duration: 8, cutFrom: 3 },
]);
```
You can mix explicit and implicit positioning freely. Clips with explicit `position` are placed there; subsequent auto-sequenced clips follow from the last clip's end:
```ts
await project.load([
{ type: "video", url: "./a.mp4", duration: 5 }, // position: 0, end: 5
{ type: "video", url: "./b.mp4", position: 10, end: 15 }, // explicit gap
{ type: "video", url: "./c.mp4", duration: 5 }, // position: 15, end: 20
]);
```
Text clips always require an explicit `position` (they're overlays on specific moments). Background music and subtitle clips already have optional `position`/`end` with their own defaults.
### Clip Types
#### Video Clip
```ts
{
type: "video";
url: string; // File path
position?: number; // Timeline start (seconds). Omit to auto-sequence after previous clip.
end?: number; // Timeline end (seconds). Use end OR duration, not both.
duration?: number; // Duration in seconds (alternative to end). end = position + duration.
cutFrom?: number; // Source offset (default: 0)
volume?: number; // Audio volume (default: 1)
transition?: {
type: string; // Any xfade transition (e.g., 'fade', 'wipeleft', 'dissolve')
duration: number; // Transition duration in seconds
};
}
```
All [xfade transitions](https://trac.ffmpeg.org/wiki/Xfade) are supported.
#### Image Clip
```ts
{
type: "image";
url: string;
position?: number; // Omit to auto-sequence after previous video/image clip
end?: number; // Use end OR duration, not both
duration?: number; // Duration in seconds (alternative to end)
width?: number; // Optional: source image width (skip probe / override)
height?: number; // Optional: source image height (skip probe / override)
imageFit?: "cover" | "contain" | "blur-fill"; // How to handle aspect ratio mismatch (see below)
blurIntensity?: number; // Blur strength for blur-fill background (default: 40, range: 10-80)
kenBurns?:
| "zoom-in" | "zoom-out" | "pan-left" | "pan-right" | "pan-up" | "pan-down"
| "smart" | "custom"
| {
type?: "zoom-in" | "zoom-out" | "pan-left" | "pan-right" | "pan-up" | "pan-down" | "smart" | "custom";
startZoom?: number;
endZoom?: number;
startX?: number; // 0 = left, 1 = right
startY?: number; // 0 = top, 1 = bottom
endX?: number;
endY?: number;
anchor?: "top" | "bottom" | "left" | "right";
easing?: "linear" | "ease-in" | "ease-out" | "ease-in-out";
};
}
```
**Image Fitting (`imageFit`):**
When an image's aspect ratio doesn't match the output (e.g., a landscape photo in a portrait video), `imageFit` controls how the mismatch is resolved:
| Mode | Behavior | Default for |
|---|---|---|
| `blur-fill` | Scale to fit, fill empty space with a blurred version of the image | Static images (no Ken Burns) |
| `cover` | Scale to fill the entire frame, center-crop any excess | Ken Burns images |
| `contain` | Scale to fit within the frame, pad with black bars | — |
If `imageFit` is not specified, the library picks the best default: **`blur-fill`** for static images (produces polished output similar to TikTok/Reels) and **`cover`** for Ken Burns images (ensures full-frame cinematic motion).
```ts
// Landscape photo in a portrait video — blurred background fills the bars (default)
{ type: "image", url: "./landscape.jpg", duration: 5 }
// Explicit cover — crops to fill the frame
{ type: "image", url: "./landscape.jpg", duration: 5, imageFit: "cover" }
// Black bars (letterbox/pillarbox)
{ type: "image", url: "./landscape.jpg", duration: 5, imageFit: "contain" }
// Stronger blur effect
{ type: "image", url: "./landscape.jpg", duration: 5, imageFit: "blur-fill", blurIntensity: 70 }
```
**Ken Burns + imageFit:** When using Ken Burns with `blur-fill` or `contain`, the pan/zoom motion applies only to the image content — the blurred background or black bars remain static, matching the behavior of modern phone video editors. Source dimensions (`width`/`height`) are required for KB + `blur-fill`/`contain`; without them it falls back to `cover`.
```ts
// Ken Burns zoom on contained image with blurred background
{
type: "image",
url: "./landscape.jpg",
duration: 5,
width: 1920,
height: 1080,
kenBurns: "zoom-in",
imageFit: "blur-fill",
}
// Ken Burns pan with black bars
{
type: "image",
url: "./landscape.jpg",
duration: 5,
width: 1920,
height: 1080,
kenBurns: "pan-right",
imageFit: "contain",
}
```
#### Color Clip
Color clips add flat colors or gradients as first-class visual elements. They support transitions, text overlays, and all the same timeline features as video and image clips. Use them for intros, outros, title cards, or anywhere you need a background.
```ts
{
type: "color";
color: string | { // Flat color string or gradient spec
type: "linear-gradient" | "radial-gradient";
colors: string[]; // 2+ color stops (named, hex, or 0x hex)
direction?: "vertical" | "horizontal"; // For linear gradients (default: "vertical")
};
position?: number; // Timeline start (seconds). Omit to auto-sequence.
end?: number; // Timeline end. Use end OR duration, not both.
duration?: number; // Duration in seconds (alternative to end).
transition?: {
type: string; // Any xfade transition (e.g., 'fade', 'wipeleft')
duration: number;
};
}
```
`color` accepts any valid FFmpeg color name or hex code:
```ts
{ type: "color", color: "navy", position: 0, end: 3 }
{ type: "color", color: "#1a1a2e", position: 0, end: 3 }
```
**Gradients:**
```ts
// Linear gradient (vertical by default)
{
type: "color",
color: { type: "linear-gradient", colors: ["#0a0a2e", "#4a148c"] },
position: 0,
end: 4,
}
// Horizontal linear gradient
{
type: "color",
color: { type: "linear-gradient", colors: ["#e74c3c", "#f1c40f", "#2ecc71"], direction: "horizontal" },
position: 0,
end: 4,
}
// Radial gradient
{
type: "color",
color: { type: "radial-gradient", colors: ["#ff8c00", "#1a0000"] },
position: 0,
end: 3,
}
```
**With transitions:**
```ts
await project.load([
{ type: "color", color: "black", position: 0, end: 3 },
{
type: "video",
url: "./main.mp4",
position: 3,
end: 8,
transition: { type: "fade", duration: 0.5 },
},
{
type: "color",
color: { type: "radial-gradient", colors: ["#2c3e50", "#000000"] },
position: 8,
end: 11,
transition: { type: "fade", duration: 0.5 },
},
{
type: "text",
text: "The End",
position: 8.5,
end: 10.5,
fontSize: 64,
fontColor: "white",
},
]);
```
> **Note:** Timeline gaps (periods with no visual content) always produce a validation error. If a gap is intentional, fill it with a `type: "color"` clip or adjust your clip positions to close the gap.
#### Effect Clip
Effects are overlay adjustment layers. They apply to the already-composed video
for a time window, and can ramp in/out smoothly (instead of appearing instantly):
```ts
{
type: "effect";
effect: EffectName; // See table below
position: number; // Required timeline start (seconds)
end?: number; // Use end OR duration, not both
duration?: number; // Duration in seconds (alternative to end)
fadeIn?: number; // Optional smooth ramp-in (seconds)
fadeOut?: number; // Optional smooth ramp-out (seconds)
params: EffectParams; // Effect-specific parameters (see table below)
}
```
All effects accept `params.amount` (0-1, default 1) to control the blend intensity. Additional per-effect parameters:
| Effect | Description | Extra Params |
|---|---|---|
| `vignette` | Darkened edges | `angle`: radians (default: PI/5) |
| `filmGrain` | Noise overlay | `strength`: noise intensity 0-1 (default: 0.35), `temporal`: boolean (default: true) |
| `gaussianBlur` | Gaussian blur | `sigma`: blur radius (default derived from amount) |
| `colorAdjust` | Color grading | `brightness`: -1..1, `contrast`: 0..3, `saturation`: 0..3, `gamma`: 0.1..10 |
| `sepia` | Warm vintage tone | — |
| `blackAndWhite` | Desaturate to grayscale | `contrast`: boost 0-3 (default: 1) |
| `sharpen` | Sharpen detail | `strength`: unsharp amount 0-3 (default: 1) |
| `chromaticAberration` | RGB channel split | `shift`: pixel offset 0-20 (default: 4) |
| `letterbox` | Cinematic bars | `size`: bar height as fraction of frame 0-0.5 (default: 0.12), `color`: string (default: "black") |
#### Text Clip
```ts
{
type: "text";
position: number;
end?: number; // Use end OR duration, not both
duration?: number; // Duration in seconds (alternative to end)
// Content
text?: string;
mode?: "static" | "word-replace" | "word-sequential" | "karaoke";
words?: Array<{ text: string; start: number; end: number }>;
wordTimestamps?: number[];
// Styling
fontFile?: string; // Custom font file path
fontFamily?: string; // System font (default: 'Sans')
fontSize?: number; // default: 48
fontColor?: string; // default: '#FFFFFF'
borderColor?: string;
borderWidth?: number;
shadowColor?: string;
shadowX?: number;
shadowY?: number;
// Positioning (omit x/y to center)
xPercent?: number; // Horizontal position as % (0 = left, 0.5 = center, 1 = right)
yPercent?: number; // Vertical position as % (0 = top, 0.5 = center, 1 = bottom)
x?: number; // Absolute X position in pixels
y?: number; // Absolute Y position in pixels
xOffset?: number; // Pixel offset added to X (works with any positioning method)
yOffset?: number; // Pixel offset added to Y (e.g., center + 50px below)
// Animation
animation?: {
type: "none" | "fade-in" | "fade-in-out" | "fade-out" | "pop" | "pop-bounce"
| "typewriter" | "scale-in" | "pulse";
in?: number; // Intro duration (seconds)
out?: number; // Outro duration (seconds)
speed?: number; // For typewriter (chars/sec) or pulse (pulses/sec)
intensity?: number; // For scale-in or pulse (size variation 0-1)
};
highlightColor?: string; // For karaoke mode (default: '#FFFF00')
highlightStyle?: "smooth" | "instant"; // 'smooth' = gradual fill, 'instant' = immediate change (default: 'smooth')
}
```
#### Subtitle Clip
Import external subtitle files (SRT, VTT, ASS/SSA):
```ts
{
type: "subtitle";
url: string; // Path to subtitle file
position?: number; // Time offset in seconds (default: 0)
// Styling (for SRT/VTT - ASS files use their own styles)
fontFamily?: string;
fontSize?: number;
fontColor?: string;
borderColor?: string;
borderWidth?: number;
opacity?: number;
}
```
#### Audio Clip
```ts
{
type: "audio";
url: string;
position?: number; // Omit to auto-sequence after previous audio clip
end?: number; // Use end OR duration, not both
duration?: number; // Duration in seconds (alternative to end)
cutFrom?: number;
volume?: number;
}
```
#### Background Music
```ts
{
type: "music"; // or "backgroundAudio"
url: string;
position?: number; // default: 0
end?: number; // default: project duration
cutFrom?: number;
volume?: number; // default: 0.2
loop?: boolean; // Loop audio to fill video duration
}
```
Background music is mixed after transitions, so video crossfades won't affect its volume.
**Looping Music:**
If your music track is shorter than your video, enable looping:
```ts
await project.load([
{ type: "video", url: "./video.mp4", position: 0, end: 120 },
{ type: "music", url: "./30s-track.mp3", volume: 0.3, loop: true },
]);
```
### Platform Presets
Use platform presets to quickly configure optimal dimensions for social media:
```ts
const project = new SIMPLEFFMPEG({ preset: "tiktok" });
```
Available presets:
| Preset | Resolution | Aspect Ratio | Use Case |
| -------------------- | ----------- | ------------ | ----------------------- |
| `tiktok` | 1080 × 1920 | 9:16 | TikTok, vertical videos |
| `youtube-short` | 1080 × 1920 | 9:16 | YouTube Shorts |
| `instagram-reel` | 1080 × 1920 | 9:16 | Instagram Reels |
| `instagram-story` | 1080 × 1920 | 9:16 | Instagram Stories |
| `snapchat` | 1080 × 1920 | 9:16 | Snapchat |
| `instagram-post` | 1080 × 1080 | 1:1 | Instagram feed posts |
| `instagram-square` | 1080 × 1080 | 1:1 | Square format |
| `youtube` | 1920 × 1080 | 16:9 | YouTube standard |
| `twitter` | 1920 × 1080 | 16:9 | Twitter/X horizontal |
| `facebook` | 1920 × 1080 | 16:9 | Facebook horizontal |
| `landscape` | 1920 × 1080 | 16:9 | General landscape |
| `twitter-portrait` | 1080 × 1350 | 4:5 | Twitter portrait |
| `instagram-portrait` | 1080 × 1350 | 4:5 | Instagram portrait |
Override preset values with explicit options:
```ts
const project = new SIMPLEFFMPEG({
preset: "tiktok",
fps: 60, // Override default 30fps
});
```
Query available presets programmatically:
```ts
SIMPLEFFMPEG.getPresetNames(); // ['tiktok', 'youtube-short', ...]
SIMPLEFFMPEG.getPresets(); // { tiktok: { width: 1080, height: 1920, fps: 30 }, ... }
```
### Watermarks
Add text or image watermarks to your videos:
**Text Watermark:**
```ts
await project.export({
outputPath: "./output.mp4",
watermark: {
type: "text",
text: "@myhandle",
position: "bottom-right", // 'top-left', 'top-right', 'bottom-left', 'bottom-right', 'center'
fontSize: 24,
fontColor: "#FFFFFF",
opacity: 0.7,
margin: 20,
},
});
```
**Image Watermark:**
```ts
await project.export({
outputPath: "./output.mp4",
watermark: {
type: "image",
url: "./logo.png",
position: "top-right",
opacity: 0.8,
scale: 0.5, // Scale to 50% of original size
margin: 15,
},
});
```
**Timed Watermark:**
```ts
await project.export({
outputPath: "./output.mp4",
watermark: {
type: "text",
text: "Limited Time!",
position: "top-left",
startTime: 5, // Appear at 5 seconds
endTime: 15, // Disappear at 15 seconds
},
});
```
**Custom Position:**
```ts
await project.export({
outputPath: "./output.mp4",
watermark: {
type: "text",
text: "Custom",
x: 100, // Exact X position in pixels
y: 50, // Exact Y position in pixels
},
});
```
### Progress Information
The `onProgress` callback receives:
```ts
{
percent?: number; // 0-100
phase?: string; // "rendering" or "batching"
timeProcessed?: number; // Seconds processed
frame?: number; // Current frame
fps?: number; // Processing speed
speed?: number; // Multiplier (e.g., 2.0 = 2x realtime)
}
```
The `phase` field indicates what the export is doing:
- `"rendering"` — main video export (includes `percent`, `frame`, etc.)
- `"batching"` — text overlay passes are running (fired once when batching starts)
Use `phase` to update your UI when the export hits 100% but still has work to do:
```ts
onProgress: ({ percent, phase }) => {
if (phase === "batching") {
console.log("Applying text overlays...");
} else {
console.log(`${percent}%`);
}
};
```
### Logging
Use the `onLog` callback to receive real-time FFmpeg output. Each log entry includes a `level` (`"stderr"` or `"stdout"`) and the raw `message` string. This is useful for debugging, monitoring, or piping FFmpeg output to your own logging system.
```ts
await project.export({
outputPath: "./output.mp4",
onLog: ({ level, message }) => {
console.log(`[ffmpeg:${level}] ${message}`);
},
});
```
The callback fires for every data chunk FFmpeg writes, including encoding stats, warnings, and codec information. It works alongside `onProgress` — both can be used simultaneously.
### Error Handling
The library provides custom error classes for structured error handling:
| Error Class | When Thrown | Properties |
| ---------------------- | -------------------------- | --------------------------------------------------------------------------- |
| `ValidationError` | Invalid clip configuration | `errors[]`, `warnings[]` (structured issues with `code`, `path`, `message`) |
| `FFmpegError` | FFmpeg command fails | `stderr`, `command`, `exitCode`, `details` |
| `MediaNotFoundError` | File not found | `path` |
| `ExportCancelledError` | Export aborted | - |
```ts
try {
await project.export({ outputPath: "./out.mp4" });
} catch (error) {
if (error.name === "ValidationError") {
// Structured validation errors
error.errors.forEach((e) =>
console.error(`[${e.code}] ${e.path}: ${e.message}`),
);
error.warnings.forEach((w) =>
console.warn(`[${w.code}] ${w.path}: ${w.message}`),
);
} else if (error.name === "FFmpegError") {
// Structured details for bug reports (last 50 lines of stderr, command, exitCode)
console.error("FFmpeg failed:", error.details);
// { stderrTail: "...", command: "ffmpeg ...", exitCode: 1 }
} else if (error.name === "MediaNotFoundError") {
console.error("File not found:", error.path);
} else if (error.name === "ExportCancelledError") {
console.log("Export was cancelled");
}
}
```
### Cancellation
Use an `AbortController` to cancel an export in progress:
```ts
const controller = new AbortController();
// Cancel after 5 seconds
setTimeout(() => controller.abort(), 5000);
try {
await project.export({
outputPath: "./out.mp4",
signal: controller.signal,
});
} catch (error) {
if (error.name === "ExportCancelledError") {
console.log("Cancelled");
}
}
```
## Examples
### Clips & Transitions
```ts
// Two clips with a crossfade
await project.load([
{ type: "video", url: "./a.mp4", position: 0, end: 5 },
{
type: "video",
url: "./b.mp4",
position: 5,
end: 10,
transition: { type: "fade", duration: 0.5 },
},
]);
```
**Image slideshow with Ken Burns effects:**
```ts
await project.load([
{ type: "image", url: "./photo1.jpg", duration: 3, kenBurns: "zoom-in" },
{ type: "image", url: "./photo2.jpg", duration: 3, kenBurns: "pan-right" },
{ type: "image", url: "./photo3.jpg", duration: 3, kenBurns: "zoom-out" },
{ type: "music", url: "./music.mp3", volume: 0.3 },
]);
```
**Custom Ken Burns (smart anchor + explicit endpoints):**
```ts
await project.load([
{
type: "image",
url: "./portrait.jpg",
duration: 5,
kenBurns: {
type: "smart",
anchor: "bottom",
startZoom: 1.05,
endZoom: 1.2,
easing: "ease-in-out",
},
},
{
type: "image",
url: "./wide.jpg",
duration: 4,
kenBurns: {
type: "custom",
startX: 0.15,
startY: 0.7,
endX: 0.85,
endY: 0.2,
easing: "ease-in-out",
},
},
]);
```
When `position` is omitted, clips are placed sequentially — see [Auto-Sequencing & Duration Shorthand](#auto-sequencing--duration-shorthand) for details.
> **Note:** Ken Burns effects work best with images at least as large as your output resolution. Smaller images are automatically upscaled (with a validation warning). Use `strictKenBurns: true` in validation options to enforce size requirements instead.
> If you pass `width`/`height`, they override probed dimensions (useful for remote or generated images).
> `smart` mode uses source vs output aspect (when known) to choose pan direction.
> Ken Burns defaults to `imageFit: "cover"` (full-frame motion). Set `imageFit: "blur-fill"` or `"contain"` for phone-style editing where the motion applies to the contained image while the background stays static.
### Text & Animations
Text is centered by default. Use `xPercent`/`yPercent` for percentage positioning, `x`/`y` for pixels, or `xOffset`/`yOffset` to nudge from any base:
```ts
await project.load([
{ type: "video", url: "./bg.mp4", position: 0, end: 10 },
// Title: centered, 100px above center
{
type: "text",
text: "Main Title",
position: 0,
end: 5,
fontSize: 72,
yOffset: -100,
},
// Subtitle: centered, 50px below center
{
type: "text",
text: "Subtitle here",
position: 0.5,
end: 5,
fontSize: 36,
yOffset: 50,
},
]);
```
**Word-by-word replacement:**
```ts
{
type: "text",
mode: "word-replace",
text: "One Two Three Four",
position: 2,
end: 6,
wordTimestamps: [2, 3, 4, 5, 6],
animation: { type: "fade-in", in: 0.2 },
fontSize: 72,
fontColor: "white",
}
```
**Typewriter, pulse, and other animations:**
```ts
// Typewriter — letters appear one at a time
{ type: "text", text: "Appearing letter by letter...", position: 1, end: 4,
animation: { type: "typewriter", speed: 15 } }
// Pulse — rhythmic scaling
{ type: "text", text: "Pulsing...", position: 0.5, end: 4.5,
animation: { type: "pulse", speed: 2, intensity: 0.2 } }
// Also available: fade-in, fade-out, fade-in-out, pop, pop-bounce, scale-in
```
**Emoji in text overlays:**
Emoji characters are automatically detected. By default they are stripped from text to prevent tofu (blank boxes). To render emoji, configure an `emojiFont` path in the constructor:
```ts
// Enable emoji rendering by providing a font path
const project = new SIMPLEFFMPEG({
width: 1920,
height: 1080,
emojiFont: "./fonts/NotoEmoji-Regular.ttf",
});
await project.load([
{ type: "video", url: "./bg.mp4", position: 0, end: 10 },
{
type: "text",
text: "small dog, big heart 🐾",
position: 1,
end: 5,
fontSize: 48,
fontColor: "#FFFFFF",
yPercent: 0.5,
},
{
type: "text",
text: "Movie night! 🎬🍿✨",
position: 5,
end: 9,
fontSize: 48,
fontColor: "#FFFFFF",
animation: { type: "fade-in-out", in: 0.5, out: 0.5 },
},
]);
```
> **Note:** Without `emojiFont`, emoji are silently stripped (no tofu). With `emojiFont`, emoji render as monochrome outlines via the ASS path. Supports fade animations (`fade-in`, `fade-out`, `fade-in-out`) and static text. For other animation types (`pop`, `typewriter`, etc.), emoji are stripped and a console warning is logged.
### Karaoke
Word-by-word highlighting with customizable colors. Use `highlightStyle: "instant"` for immediate color changes instead of the default smooth fill:
```ts
await project.load([
{ type: "video", url: "./music-video.mp4", position: 0, end: 10 },
{
type: "text",
mode: "karaoke",
text: "Never gonna give you up",
position: 0,
end: 5,
words: [
{ text: "Never", start: 0, end: 0.8 },
{ text: "gonna", start: 0.8, end: 1.4 },
{ text: "give", start: 1.4, end: 2.0 },
{ text: "you", start: 2.0, end: 2.5 },
{ text: "up", start: 2.5, end: 3.5 },
],
fontColor: "#FFFFFF",
highlightColor: "#00FF00",
fontSize: 52,
yPercent: 0.85,
},
]);
```
For simple usage without explicit word timings, just provide `text` and `wordTimestamps` — the library will split on spaces. Multi-line karaoke is supported with `\n` in the text string or `lineBreak: true` in the words array.
### Subtitles
Import external subtitle files (SRT, VTT, ASS/SSA):
```ts
await project.load([
{ type: "video", url: "./video.mp4", position: 0, end: 60 },
{
type: "subtitle",
url: "./subtitles.srt", // or .vtt, .ass, .ssa
fontSize: 24,
fontColor: "#FFFFFF",
borderColor: "#000000",
},
]);
```
Use `position` to offset all subtitle timestamps forward (e.g., `position: 2.5` delays everything by 2.5s). ASS/SSA files use their own embedded styles — font options are for SRT/VTT imports.
### Export Settings
```ts
// High-quality H.265 with metadata
await project.export({
outputPath: "./output.mp4",
videoCodec: "libx265",
crf: 18,
preset: "slow",
audioCodec: "libopus",
audioBitrate: "256k",
metadata: { title: "My Video", artist: "My Name", date: "2025" },
});
// Hardware-accelerated (macOS)
await project.export({
outputPath: "./output.mp4",
hwaccel: "videotoolbox",
videoCodec: "h264_videotoolbox",
});
// Two-pass encoding for target file size
await project.export({
outputPath: "./output.mp4",
twoPass: true,
videoBitrate: "5M",
preset: "slow",
});
// Scale output resolution
await project.export({ outputPath: "./720p.mp4", outputResolution: "720p" });
// Audio-only export
await project.export({
outputPath: "./audio.mp3",
audioOnly: true,
audioCodec: "libmp3lame",
audioBitrate: "320k",
});
// Generate thumbnail
await project.export({
outputPath: "./output.mp4",
thumbnail: { outputPath: "./thumb.jpg", time: 5, width: 640 },
});
// Debug — save the FFmpeg command to a file
await project.export({
outputPath: "./output.mp4",
verbose: true,
saveCommand: "./ffmpeg-command.txt",
});
```
## Advanced
### Timeline Behavior
- Clip timing uses `[position, end)` intervals in seconds
- Transitions create overlaps that reduce total duration
- Background music is mixed after video transitions (unaffected by crossfades)
**Transition Compensation:**
FFmpeg's `xfade` transitions **overlap** clips, compressing the timeline. A 1s fade between two 10s clips produces 19s of output, not 20s. With multiple transitions this compounds.
By default, simple-ffmpeg automatically adjusts text and subtitle timings to compensate. When you position text at "15s", it appears at the visual 15s mark regardless of how many transitions preceded it:
```ts
await project.load([
{ type: "video", url: "./a.mp4", position: 0, end: 10 },
{
type: "video",
url: "./b.mp4",
position: 10,
end: 20,
transition: { type: "fade", duration: 1 },
},
{ type: "text", text: "Appears at 15s visual", position: 15, end: 18 },
]);
```
Disable with `compensateTransitions: false` in export options if you've pre-calculated offsets yourself.
### Auto-Batching
FFmpeg's `filter_complex` has platform-specific length limits (Windows ~32KB, macOS ~1MB, Linux ~2MB). When text animations create many filter nodes, the command can exceed these limits.
simple-ffmpeg handles this automatically — detecting oversized filter graphs and splitting text overlays into multiple rendering passes with intermediate files. No configuration needed.
For very complex projects, you can tune it:
```js
await project.export({
textMaxNodesPerPass: 30, // default: 75
intermediateVideoCodec: "libx264", // default
intermediateCrf: 18, // default (high quality)
intermediatePreset: "veryfast", // default (fast encoding)
});
```
Batching activates for typewriter animations with long text, many simultaneous text overlays, or complex animation combinations. With `verbose: true`, you'll see when it kicks in.
## Real-World Usage Patterns
### Data Pipeline Example
Generate videos programmatically from structured data — database records, API responses, CMS content, etc. This example creates property tour videos from real estate listings:
```js
import SIMPLEFFMPEG from "simple-ffmpegjs";
const listings = await db.getActiveListings(); // your data source
async function generateListingVideo(listing, outputPath) {
const photos = listing.photos; // ['kitchen.jpg', 'living-room.jpg', ...]
const slideDuration = 4;
// Build an image slideshow from listing photos (auto-sequenced with crossfades)
const transitionDuration = 0.5;
const photoClips = photos.map((photo, i) => ({
type: "image",
url: photo,
duration: slideDuration,
kenBurns: i % 2 === 0 ? "zoom-in" : "pan-right",
...(i > 0 && {
transition: { type: "fade", duration: transitionDuration },
}),
}));
const totalDuration = SIMPLEFFMPEG.getDuration(photoClips);
const clips = [
...photoClips,
// Price banner
{
type: "text",
text: listing.price,
position: 0.5,
end: totalDuration - 0.5,
fontSize: 36,
fontColor: "#FFFFFF",
backgroundColor: "#000000",
backgroundOpacity: 0.6,
padding: 12,
xPercent: 0.5,
yPercent: 0.1,
},
// Address at the bottom
{
type: "text",
text: listing.address,
position: 0.5,
end: totalDuration - 0.5,
fontSize: 28,
fontColor: "#FFFFFF",
borderColor: "#000000",
borderWidth: 2,
xPercent: 0.5,
yPercent: 0.9,
},
{ type: "music", url: "./assets/ambient.mp3", volume: 0.15, loop: true },
];
const project = new SIMPLEFFMPEG({ preset: "instagram-reel" });
await project.load(clips);
return project.export({ outputPath });
}
// Batch generate videos for all listings
for (const listing of listings) {
await generateListingVideo(listing, `./output/${listing.id}.mp4`);
}
```
### AI Video Generation Pipeline Example
Combine schema export, validation, and structured error codes to build a complete AI-driven video generation pipeline. The schema gives the model the exact specification it needs, and the validation loop lets it self-correct until the output is valid.
```js
import SIMPLEFFMPEG from "simple-ffmpegjs";
// 1. Build the schema context for the AI
// Only expose the clip types you want the AI to work with.
// Developer-level config (codecs, resolution, etc.) stays out of the schema.
const schema = SIMPLEFFMPEG.getSchema({
include: ["video", "image", "text", "music"],
instructions: [
"You are composing a short-form video for TikTok.",
"Keep total duration under 30 seconds.",
"Return ONLY valid JSON — an array of clip objects.",
],
moduleInstructions: {
video: "Use fade transitions between clips. Keep each clip 3-6 seconds.",
text: [
"Add a title in the first 2 seconds with fontSize 72.",
"Use white text with a black border for readability.",
],
music: "Always include looping background music at volume 0.15.",
},
});
// 2. Send the schema + prompt to your LLM
async function askAI(systemPrompt, userPrompt) {
// Replace with your LLM provider (OpenAI, Anthropic, etc.)
const response = await llm.chat({
messages: [
{ role: "system", content: systemPrompt },
{ role: "user", content: userPrompt },
],
});
return JSON.parse(response.content);
}
// 3. Generate → Validate → Retry loop
async function generateVideo(userPrompt, media) {
// Build the system prompt with schema + available media and their details.
// Descriptions and durations help the AI make good creative decisions —
// ordering clips logically, setting accurate position/end times, etc.
const mediaList = media
.map((m) => ` - ${m.file} (${m.duration}s) — ${m.description}`)
.join("\n");
const systemPrompt = [
"You are a video editor. Given the user's request and the available media,",
"produce a clips array that follows this schema:\n",
schema,
"\nAvailable media (use these exact file paths):",
mediaList,
].join("\n");
const knownPaths = media.map((m) => m.file);
// First attempt
let clips = await askAI(systemPrompt, userPrompt);
let result = SIMPLEFFMPEG.validate(clips, { skipFileChecks: true });
let attempts = 1;
// Self-correction loop: feed structured errors back to the AI
while (!result.valid && attempts < 3) {
const errorFeedback = result.errors
.map((e) => `[${e.code}] ${e.path}: ${e.message}`)
.join("\n");
clips = await askAI(
systemPrompt,
[
`Your previous output had validation errors:\n${errorFeedback}`,
`\nOriginal request: ${userPrompt}`,
"\nPlease fix the errors and return the corrected clips array.",
].join("\n"),
);
result = SIMPLEFFMPEG.validate(clips, { skipFileChecks: true });
attempts++;
}
if (!result.valid) {
throw new Error(
`Failed to generate valid config after ${attempts} attempts:\n` +
SIMPLEFFMPEG.formatValidationResult(result),
);
}
// 4. Verify the AI only used known media paths
// The structural loop (skipFileChecks: true) can't catch hallucinated paths.
// You could also put this inside the retry loop to let the AI self-correct
// bad paths — just append the unknown paths to the error feedback string.
const usedPaths = clips.filter((c) => c.url).map((c) => c.url);
const unknownPaths = usedPaths.filter((p) => !knownPaths.includes(p));
if (unknownPaths.length > 0) {
throw new Error(`AI used unknown media paths: ${unknownPaths.join(", ")}`);
}
// 5. Build and export
// load() will also throw MediaNotFoundError if any file is missing on disk.
const project = new SIMPLEFFMPEG({ preset: "tiktok" });
await project.load(clips);
return project.export({
outputPath: "./output.mp4",
onProgress: ({ percent }) => console.log(`Rendering: ${percent}%`),
});
}
// Usage
await generateVideo("Make a hype travel montage with upbeat text overlays", [
{
file: "clips/beach-drone.mp4",
duration: 4,
description:
"Aerial drone shot of a tropical beach with people playing volleyball",
},
{
file: "clips/city-timelapse.mp4",
duration: 8,
description: "Timelapse of a city skyline transitioning from day to night",
},
{
file: "clips/sunset.mp4",
duration: 6,
description: "Golden hour sunset over the ocean with gentle waves",
},
{
file: "music/upbeat-track.mp3",
duration: 120,
description:
"Upbeat electronic track with a strong beat, good for montages",
},
]);
```
The key parts of this pattern:
1. **`getSchema()`** gives the AI a precise specification of what it can produce, with only the clip types you've chosen to expose.
2. **`instructions` / `moduleInstructions`** embed your creative constraints directly into the spec — the AI treats them the same as built-in rules.
3. **Media descriptions** with durations and content details give the AI enough context to make good creative decisions — ordering clips logically, setting accurate timings, and choosing the right media for each part of the video.
4. **`validate()`** with `skipFileChecks: true` checks structural correctness in the retry loop — types, timelines, required fields — without touching the filesystem.
5. **The retry loop** lets the AI self-correct. Most validation failures resolve in one retry.
6. **The path guard** catches hallucinated file paths before `load()` hits the filesystem. You can optionally move this check inside the retry loop to let the AI self-correct bad paths. `load()` itself will also throw `MediaNotFoundError` if a file is missing on disk.
## Testing
### Automated Tests
The library includes comprehensive unit and integration tests using Vitest:
```bash
# Run all tests
npm test
# Run unit tests only
npm run test:unit
# Run integration tests only
npm run test:integration
# Run with watch mode
npm run test:watch
```
### Manual Verification
For visual verification, run the demo suite to generate sample videos covering all major features. Each demo outputs to its own subfolder under `examples/output/` and includes annotated expected timelines so you know exactly what to look for:
```bash
# Run all demos (color clips, effects, transitions, text, emoji, Ken Burns, audio, watermarks, karaoke, torture test)
node examples/run-examples.js
# Run a specific demo by name (partial match)
node examples/run-examples.js transitions
node examples/run-examples.js torture ken
```
Available demo scripts (can also be run individually):
| Script | What it tests |
| ------------------------------- | -------------------------------------------------------------------------------------- |
| `demo-color-clips.js` | Flat colors, linear/radial gradients, transitions, full composition with color clips |
| `demo-effects.js` | Timed overlay effects (all 9 effects) with smooth fade ramps |
| `demo-transitions.js` | Fade, wipe, slide, dissolve, fadeblack/white, short/long durations, image transitions |
| `demo-text-and-animations.js` | Positioning, fade, pop, pop-bounce, typewriter, scale-in, pulse, styling, word-replace |
| `demo-emoji-text.js` | Emoji stripping (default) and opt-in rendering via emojiFont, fade, styling, fallback |
| `demo-ken-burns.js` | All 6 presets, smart anchors, custom diagonal, slideshow with transitions |
| `demo-audio-mixing.js` | Volume levels, background music, standalone audio, loop, multi-source mix |
| `demo-watermarks.js` | Text/image watermarks, all positions, timed appearance, styled over transitions |
| `demo-karaoke-and-subtitles.js` | Smooth/instant karaoke, word timestamps, multiline, SRT, VTT, mixed text+karaoke |
| `demo-image-fit.js` | Image fitting modes (blur-fill, cover, contain), Ken Burns + imageFit, mixed timelines |
| `demo-torture-test.js` | Kitchen sink, many clips+gaps+transitions, 6 simultaneous text animations, edge cases |
Each script header contains a `WHAT TO CHECK` section describing the expected visual output at every timestamp, making it easy to spot regressions.
## Contributing
Contributions are welcome. Please open an issue to discuss significant changes before submitting a pull request.
1. Fork the repository
2. Create a feature branch (`git checkout -b feature/my-feature`)
3. Write tests for new functionality
4. Ensure all tests pass (`npm test`)
5. Submit a pull request
## Credits
Inspired by [ezffmpeg](https://github.com/ezffmpeg/ezffmpeg) by John Chen.
## License
MIT